I’m doing a safari 5 extension today and I wanted to document the beginning of my experience to hopefully help devs down the road who also take this same adventure. I’ve also attached a Safari Extensions PDF from Apple that explains extension creation in greater detail.
*note – I recently switched back to mac. Hopefully this will work for you PC folk as well.
Requirements
1) Download Safari 5
2) Once you have Safari installed, go to preferences, then advanced, and select “Show Develop menu in menu bar”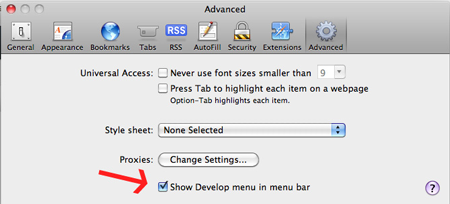
3) Now look for “Develop” on the Menu bar. Click on it and select “Enabled Extensions”.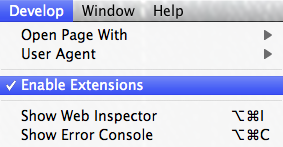
Starting a New Extension
Now that you meet the requirements, it’s time to get started. First thing you need to is open the Extension Builder, like so: 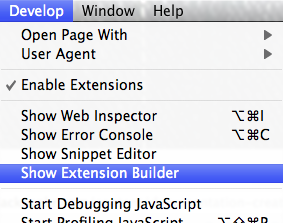
Now that the Extension Builder is open, click the little + sign at the bottom left to start a new project. 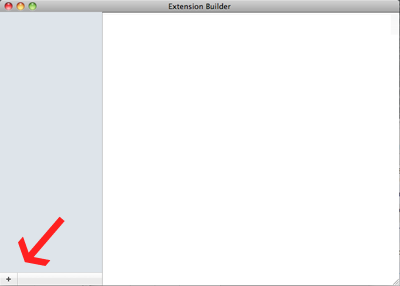
Get Certified
You’ll need a certificate from Apple before you can start developing. If you’re already an apple developer then you just merge Safari Development to your account. If your not an apple developer at all, don’t worry – it’s free. Visit the Safari Developer Program to get started.
After you’ve signed up as a developer, visit the Extensions Certificate page. The certificates page will guide you through setting up your certificate.
Build Yourself An Extension
Now that you’re certified, the Extension Builder will allow you to install and build your extension.
There’s one step left. It’s time to build your resource file (can be html, css, a script etc..). For my example, I’m going to use an HTML file.
I created test.html and put it in the folder test.safariexntionsion (which was created by the extension builder once I started the new extension “test”).
My test.html looks like this:
<!DOCTYPE html>
<html>
<head>
<title>My Test Title</title>
</head>
<body>Jack’s Test</body>
</html>
At this point I have:
– extension folder: Created by me to house my project.
— test.safariextension: Created by extension builder to house the extension.
— Info.plist: Created by extension builder.
— test.html: Created by me and it will by the source html of the project.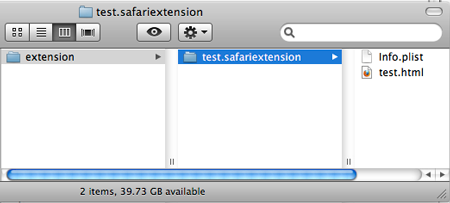
Time to create your Extension Chrome. Scroll down to Extension Chrome. You’ll need to insert a label and attach your html as well (by selected it in the “File” combo box).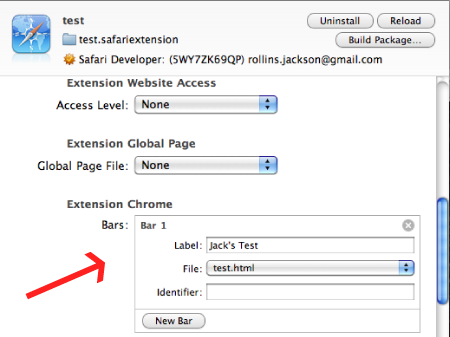
Now go back to the extention builder and look for the install button. It should be at the top right of the window.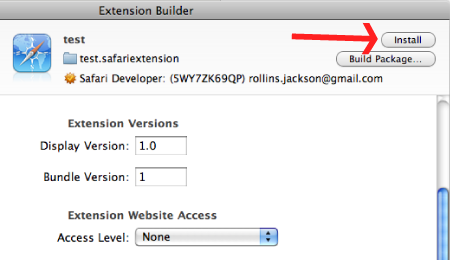
Go back into Safari and you’ll see your Extension’s label in the newly added extension container. It doesn’t do anything now, but it will!
Now that I’ve helped you get started on your way, grab a copy of the PDF I’ve attached to this article and it will help you get into the the real guts of extensions. I honestly don’t know how well extensions are going to catch on, but at least we’ll know how to make them! hah.